Eniko Fox's personal blog 

Eniko Fox

Reflective materials in Block Game

Over the holidays I implemented a system for reflective materials in Block Game. Here I’ll go over roughly how it works. I originally intended for this post to be a deep dive, but then I realized that the nitty gritty on this one just isn’t that interesting. Or at least, I’m just not that interested in doing a deep dive on it so this one will stay fairly high level.

Anyway, it all started when I got introduced to matcaps over on Mastodon. Matcaps are a neat way to add texture to a model without texturing it. You obtain, via photograph, 3D render, or even freehand painting, a spherical map of a material. Then, you apply it to an object by sampling the sphere based on where the normal is pointing using the view space x and y coordinates. And that, I thought, was pretty rad.

Matcap example from the matcaps library github.com/nidorx/matcaps

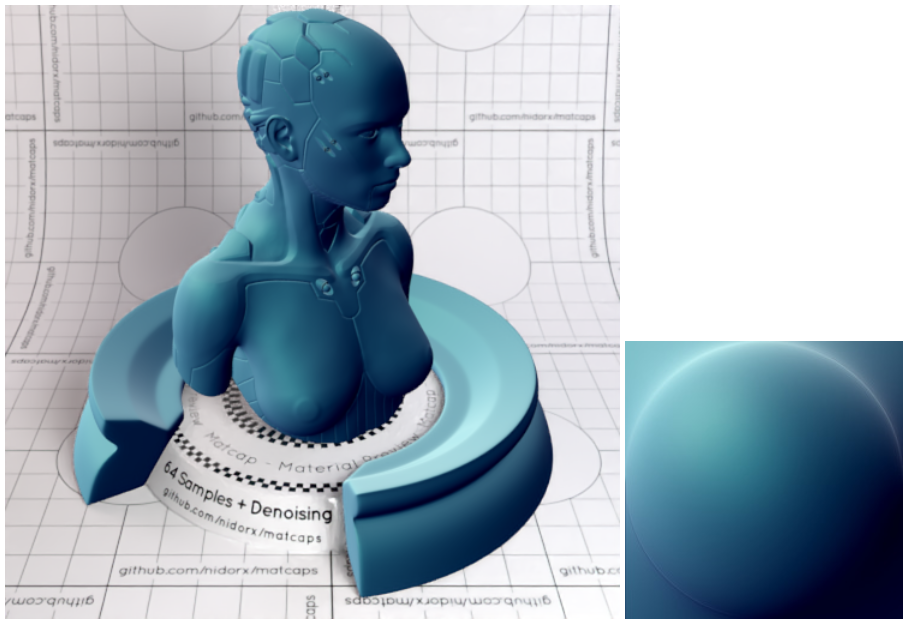
This works because when you look at an object in view space, none of the normals will be pointing away. They’ll either be pointing sideways or nominally at the camera. So half a sphere is all you need.

And I thought to myself: hey, I’ve used the spherize filter in Photoshop to make spheres out of squares. And I also thought to myself: hey, if I flip the camera around and render the scene with a high field of view into a square texture, then I could spherize that and use it as a matcap for reflective materials!

Is this the right way to do reflective materials? Absolutely not. Does it work? Yes, sometimes very well and occasionally not so good.

Continue reading...
Eniko Fox

Software occlusion culling in Block Game

My GPU is the integrated Radeon Vega 8 that comes with my AMD Ryzen 7 5700G CPU. I tell you this so you know that my workstation is not a graphical computing powerhouse. It is, in fact, quite weak. To its credit my integrated GPU shows up as 48% faster on UserBenchmark than the GPU in my low end hardware target; a laptop I bought in 2012.

(Side note: I’m aware of accusations of inaccuracy surrounding UserBenchmarks, but it’s not that serious. I just think it’s funny that an iGPU I picked up recently doesn’t compare more favorably to a 14 year old laptop GPU that wasn’t considered that great even at the time.)

That, and the fact I want my game to run well even on a potato, is why I recently decided to try my hand at writing a software rendered occlusion culling solution for the Block Game (working title) I’m developing as I’ve always been interested in the idea. Blocks and chunks are axis aligned cubes, which makes things easier, and block games tend to have a ton of hidden geometry in the form of underground caves. There are other ways to cull these, but the algorithms tend to be fairly complex and this seemed like a good way to avoid that complexity and stick with something very conceptually simple.

In this post I’ll be explaining the development process and the solution that I eventually landed on. If you like you can also read the development thread I posted on Mastodon and Bluesky.

Before I start though I’d like to say that this came out quite well, better than I expected. It runs in half a frame at 60 FPS or less (threaded, of course) and generally culls at least 50% of the chunks that survive frustum culling. Above ground, looking straight ahead at the horizon it’ll cull around between 50 and 60% of chunks, but indoors and below ground in caves it can cull upwards of 95% of chunks, resulting in framerates of 400+ even on my weak system. All around a resounding success, though it has some cases where it breaks down which I’ll touch on at the very end of this post.

Comparison of depth occlusion culling on/off, off on left, on on right.
Continue reading...
Eniko Fox

Reframing my way out of burnout

This is a post about my personal life and my mental health and something I want to try to fix things (even though I have no idea if it will work) and see if I can help my burnout recovery. If you’re here for my tech stuff, you can safely skip this one.

Continue reading...
Eniko Fox

"Hello world" in Bismuth

This is the third in a series of posts about a virtual machine I’m developing as a hobby project called Bismuth. I’ve talked a lot about Bismuth, mostly on social media, but I don’t think I’ve done a good job at communicating how you go from some code to a program in this VM. In this post I aim to rectify that by walking you through the entire life cycle of a hello world Bismuth program, from the highest level to the lowest.

let hello = data_utf8("Hello world!\n");

func main() i32 {
    // system call 0x10 is the PrintStr system call
    sys(0x10, hello, 0, sizeof(hello));
    return 0;
}

This code will be converted to the VM’s intermediate representation, which can then be transpiled to C, or compiled to a binary version of the IR, which the VM ingests and turns into bytecode and runs.

Continue reading...
Eniko Fox

Memory management and safety in Bismuth VM

This is the second in a series of posts about a virtual machine I’m developing as a hobby project called Bismuth. In this edition we’re going to look at the VM’s design for memory management and safety. To start with I’ll remind you of the design goals for this VM as detailed in my last post, with those that apply here in bold:

  1. Must be fast
  2. The IR must be compatible with standard C
  3. Can run in a browser
  4. The VM must be easy to implement

Not to give away the twist, but when you combine points 2 and 4 with a VM that cares about memory safety (i.e. programs should not be able to do things like read outside of the bounds of an allocated region of memory) things can get a little bit complicated. So let’s walk through the stages of grief that I experienced and the solutions I came to during the bargaining stage when designing the memory management and safety features of the Bismuth VM.

Continue reading...